How to Reduce the Cost of Deck Repair

Whether you’re doing cosmetic repairs or a serious structural repair, it’s important to hire professionals. However, negotiating terms and shopping for contractor discounts can help reduce the cost of deck repair.

Deck Repair

Deck repair is a matter of safety, and simple timely repairs can prevent more costly problems in the future. Fortunately, most home owners can handle minor maintenance tasks like securing loose railings and staining their decks. Visit Website to learn more.

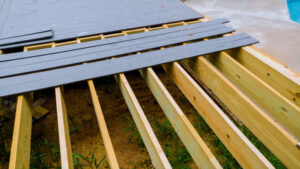
A deck that’s been damaged by storm or normal wear and tear needs repair as soon as possible. In the case of a wooden deck, this means addressing issues like loose boards and rotted wood. Depending on the extent of damage, you might need to replace some or all of the affected boards.

Loose boards are an immediate safety hazard for anyone walking on the deck, leading to fractures and sprains. They can also cause long-term structural damage as they shift and compress joists. In addition, loose boards allow moisture to infiltrate the structure, which can lead to mildew and wood rot.

One of the easiest ways to determine whether a board is rotting is to look for signs of water damage. Some discoloration and weathering is natural over time, but excessive deterioration indicates that the board needs to be replaced.

Another common sign of damage is a spongy feel to the board. This could indicate that the foam core has degraded and exposed a softer layer. This can be a serious problem and should be addressed as quickly as possible to prevent further degradation of the board.

Other signs of damage include cracks in the fiberglass shell and dings that expose the foam. These can be a result of damage from heavy surfers or other activity on the deck. In most cases, these dings can be repaired using fiberglass resin and epoxy to reconnect the damaged layers.

When it comes to particle board, damage can also occur when the boards are glued together. Epoxy is the best glue to use for this purpose as it bonds well with both sides of the board. This type of glue is also good for joining boards that have developed a small crack.

Before attempting to repair a crack, you’ll need to ensure that the board is completely dry. Moisture can cause the board to swell or warp, making it difficult to repair. Using a hairdryer and fans to speed up the drying process can help. Once the surface is dry, sand the affected area with medium-grit sandpaper to prepare it for repairs.

Water Damage

Over time, sun and rain take their toll on wooden decks. When wood becomes splintered, flaking, cracking or exhibiting other signs of damage, it’s time to look into deck repair options. Often, wood needs to be replaced before it starts breaking down further and posing safety risks for anyone walking on the surface.

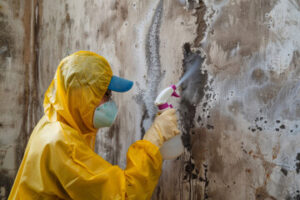
Water damage from moisture infiltration is another common deck problem. It is possible to protect against this by applying a stain and/or sealant that offers waterproofing properties. But if these protective treatments fail, moisture can seep into the wood and attract a fungus that leads to wood rot. Fungus spores grow well in warm areas rich with moisture, and the rotting wood can eventually weaken or even disintegrate, creating a dangerously slick spot.

Moisture can also lead to a condition known as heaving, which causes portions of the deck to rise and fall like ice floating in a drink. This happens when footings, the concrete pads that support a deck’s posts, aren’t installed below the frost line, as required by building codes in colder regions. If the heaving is severe, it can pull up or even collapse your entire deck.

Termite infestations and insect damage can wreak havoc on a deck. If you notice piles of 1-2-inch insect wings or frass (termite droppings that resemble sawdust), it’s time to contact a local exterminator for help.

Loose railings can also be a serious safety hazard, especially for elderly or disabled persons. A loose railing may fall or get tangled up in a person’s clothing, leading to serious injury. A professional can determine the source of a loose railing and either fix or replace it, as needed.

Nails and screws corrode over time, which can make parts of a deck come loose or fall off completely. Regularly checking for corroded hardware is an easy, inexpensive part of a homeowner’s maintenance routine that can help prevent the need to complete costly deck repairs. Loose nails or screws should be replaced as soon as they’re spotted to avoid potential injury for anyone using the deck.

Loose Railings

Metal railings are a great safety feature on decks, but they can loosen over time. Loose metal railings can be dangerous, especially for children and elderly people. The best way to prevent loose porch railings is by performing regular maintenance. The first step is to carefully inspect the railings and posts to determine what caused them to become loose. Then, you can choose the right repair method.

One common cause of loose wooden porch railings is weather. Prolonged exposure to sunlight can fade, warp, and dry out wood, causing it to weaken over time. Humidity and moisture can also lead to wood rot and hardware rust. Wind can dislodge or damage the connections between railings, and hailstorms can dent or weaken the hardware.

Whether the railings are made of wood or metal, the steps for repairing them are similar. Examine the connections to make sure the screws, bolts, or nails are tightened properly. If the railings still wobble, you may need to reinforce them. Try using metal brackets, wood blocks, or stiffeners specifically designed for your type of porch railing.

You may also need to re-tighten the carriage bolts or screws that hold the railings in place. Wood expands and contracts with the seasons, and continuous freeze-thaw cycles can cause the hardware to loosen over time. Periodically tightening the bolts or screws can eliminate wobbling in wooden railings, but it is essential to follow a routine maintenance schedule to prevent problems from returning.

Plastic or composite railings are less likely to become loose than wood, but they can still become loose over time. To fix a loose plastic or composite railing, first locate the specific area that’s loose. Then, inspect each individual board to make sure it’s level and properly aligned. Finally, use a ratchet or drill to tighten any hardware that’s loose.

Pests

The slightest spill or crumb of food on your deck can serve as an invitation to pests. Keeping your deck clean on a daily basis can drastically cut down on how often you need to deal with pests. Sweeping the wood and wiping down surfaces with a cleaner made from a quart of bleach and a gallon of water will help keep your deck free of insects like ants, carpenter bees, hornets, and powderpost beetles.

Pests are especially attracted to old wooden decks that have become damaged by moisture and rot. These insects will slowly eat away at the materials that hold your deck together, eventually leaving you with a structure in need of major repairs or replacement. It’s important to look for these issues early on so that you can treat the pest problem and prevent it from spreading further.

While you can keep an eye out for obvious signs of pest damage, some red flags may be harder to spot. For example, a termite infestation could appear to be wood rot until you probe the affected area. Luckily, a professional will be able to tell the difference between the two with ease.

Rodents also cause significant damage to wood decks and are a serious risk for homeowners. Signs of rodent activity include greasy trails left behind by scurrying rats or mice, as well as holes in the deck and the surrounding areas. Termite damage can be more difficult to spot, but it’s essential to have any suspected infestation inspected by a professional.

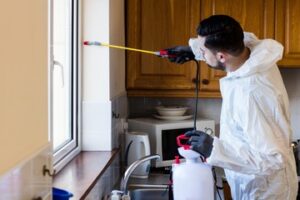
If you have a problem with pests, try using repellent sprays to deter them. However, this can be dangerous for pets and children, so it’s best to hire a pest control specialist who can humanely remove the pests from your property.

Other ways to keep pests away from your deck include putting up netting to cover it, as well as making sure all plants are kept trimmed and away from the deck itself. You can also install flashing lights to deter possums and raccoons from living under your deck, as well as special “bug lights” that emit low-level light frequencies that don’t attract bugs.

Why It Is Important to Hire a Birth Injury Attorney

Birth Injury Attorney can help you file a lawsuit against the medical professional and hospital responsible for your child’s injuries. They will investigate the case and collect evidence such as medical records, bills, expert opinions, and other information.

They will also negotiate with the insurance company to recover a fair settlement on your behalf. They will prepare the case for trial if they cannot reach a settlement.

Injuries that occur during birth are often the result of medical malpractice. This type of negligence can have a life-long impact on the victim and their family. Working with a skilled and experienced New York birth injury attorney is important to ensure that the medical professionals who committed the malpractice are held accountable. A successful lawsuit can also help families obtain resources to pay for long-term care and compensate them for their emotional distress.

A birth injury attorney is a lawyer who specializes in cases involving medical malpractice during pregnancy and childbirth. Unlike a general practitioner, a birth injury attorney has extensive knowledge of the laws that apply to these cases. Moreover, a birth injury attorney can handle many aspects of the case, including identifying the responsible parties and collecting evidence. A birth injury attorney also has experience negotiating with insurance companies and litigating cases in court.

To file a lawsuit against a healthcare professional for a birth injury, you must prove that the medical provider breached the standard of care in your case. This is typically done by presenting evidence such as medical records and hospital bills. An experienced New York birth injury lawyer knows how to collect this evidence quickly and efficiently.

Once the attorney has gathered evidence, they will prepare your case for trial. This includes filing a Notice of Claim with the healthcare provider and preparing documents for discovery. It is crucial to file a claim within the statute of limitations, which is two-and-a-half years after your injury occurs.

In addition to establishing negligence, your lawyer must establish causation. To do this, they will seek the opinion of a medical expert who can explain how the medical provider’s negligence caused your child’s injury. The medical expert will review your child’s medical records and provide a written report.

The New York birth injury lawyers at our firm have recovered millions of dollars in compensation for clients whose children suffered injuries due to medical negligence during the delivery process. This includes multi-million-dollar settlements negotiated with malpractice insurers, and verdicts won in front of a jury.

Reputation

A birth injury attorney with a good reputation for getting top dollar settlements and verdicts is likely to be able to get your family the best results. An experienced lawyer will be able to build a strong case for you by examining medical records, collecting evidence, and securing expert testimony. They can also help you determine the extent of your family’s losses and establish what damages to seek.

When a medical professional fails to uphold the standard of care during labor and delivery, both mother and baby can suffer life-altering injuries. If your child’s birth injury was due to medical negligence, you may be entitled to financial compensation to pay for the cost of treatment and other expenses. Hiring a birth injury lawyer to file a claim is the first step in pursuing justice for your family.

It is important to hire a birth injury lawyer immediately after your child’s injury to ensure that all claims are filed within the statute of limitations. If you do not act quickly, you will not be able to take legal action. A reputable birth injury attorney will be familiar with the laws in your state and can advise you on when to file a lawsuit.

In addition to the costs of treating your child’s birth injury, you may be able to recover damages for noneconomic losses, such as emotional distress and physical pain. Compensation for these losses can help you pay for access to home modifications, adaptive equipment, and special education and training.

A birth injury lawyer who specializes in medical malpractice will have the experience to handle your case efficiently. They will be able to identify the responsible parties and gather evidence, including medical records and bills. They will also be able to secure expert opinions and identify policies and protocols that were violated. They can also represent your interests at trial if negotiations cannot result in a fair settlement.

If you believe your child’s condition was caused by a medical mistake, an experienced Rochester birth injury lawyer can help you pursue monetary compensation for your losses. Contact us today to schedule a free case review.

Compensation

When a medical professional makes a mistake during labor and delivery, it can have devastating consequences for the mother and child. In some cases, a birth injury may lead to permanent disability and life-altering changes in quality of life. A birth injury lawyer can help families receive compensation for their losses. While this compensation can’t undo the harm, it can help pay for necessary treatments and support the family through their lifetime.

To file a lawsuit, the victim must be able to prove that the medical provider breached their duty of care during labor and delivery. A birth injury attorney will consult with a medical expert to determine the standard of care for your specific situation and demonstrate how the negligence caused the injury. Depending on the severity of the injury, you can claim economic damages, such as past and future medical expenses, lost income, and other related costs.

Non-economic damages, such as pain and suffering, loss of enjoyment of life, and physical and emotional distress, are also awarded to victims of birth injuries. While these damages can’t fully compensate for the harm caused by the medical mistake, they can help you cope with the aftermath of the incident. In addition, punitive damages may be awarded to defendants who commit egregious acts of gross negligence.

A birth injury lawyer can also help you deal with insurers to ensure that your case gets the maximum amount of compensation possible. Insurance companies often use pressure tactics to force victims into settling for less than their claim is worth. An experienced lawyer can fight back against these pressures to protect the rights of their clients.

A birth injury attorney can also assist with filing a medical malpractice lawsuit against the negligent medical professionals. This legal action must be filed within the statute of limitations, which is two and a half years in New York. Your attorney can negotiate with the hospital’s insurer to settle your claim or, if necessary, bring the case to trial. They can also gather evidence to convince a jury of the medical professionals’ negligence and demonstrate that their actions contributed to the child’s injury.

Time limit

A birth injury can have a profound effect on a family, often requiring costly medical treatments and ongoing care. A skilled and experienced attorney can help victims and their families receive the compensation they deserve. However, these cases can be complicated and time consuming. The time limit for filing a claim varies by state, and working with an attorney who understands the statute of limitations is vital.

A legal professional will begin by reviewing your child’s medical records and gathering evidence. This may include expert witness statements and detailed documentation. Your attorney will also determine the extent of your child’s injuries and the impact they have had on your family. Your lawyer can then file a complaint with the appropriate New York court. This process is called a notice of claim, and it begins the formal process of seeking compensation from the responsible parties.

It is important to contact an experienced attorney as soon as you believe your child has suffered a birth injury. Birth injury cases are governed by strict statutes of limitations, and if you do not file your lawsuit in the proper timeframe, you could lose your right to recovery damages.

Each state has different rules regarding the statute of limitations, and it is crucial to consult with a knowledgeable birth injury attorney as soon as you realize your child has been harmed by medical malpractice. Wrongful death claims, which involve the death of a mother or child due to negligent healthcare providers during labor and delivery, are also governed by statutes of limitations that vary by state.

For example, in New York, adult patients have two years and six months to file a medical malpractice claim. However, under CPLR 208, children have up to ten years to bring a birth injury lawsuit.

Once the lawsuit is filed, both parties will engage in a discovery process. This involves exchanging information and evidence related to the case, and it may also include depositions and interrogatories. Depending on the circumstances of your case, your lawyer may recommend mediation or arbitration to settle the matter. If a settlement cannot be reached, your case will go to trial, where a judge or jury will determine liability and damages.

A Guide to Roofing

Roofs are complex systems that protect homes from the elements. Our guide covers roofing, from construction materials and structures to maintenance and repairs.

The roof frame consists of rafters or prefabricated trusses. It is covered by sheathing, usually plywood or oriented strand board (OSB). Older houses may have tongue-and-groove or narrow 1-by-4-skip sheathing boards of sawn lumber. Click https://www.ellingsonroofing.com/ to learn more.

Plywood is a versatile engineered wood product that is made by gluing together thin layers of veneers. It’s an ideal choice for roofing sheathing because it provides a durable base that’s designed to withstand the weight of your roof’s finish materials and weather elements. It’s also an affordable material that can be easily worked with to match the aesthetic of your home.

Compared to other roofing materials, roofing plywood offers stability and durability while remaining affordable. However, it’s not as aesthetically pleasing as tiles or metal, requiring more consistent maintenance to ensure a long lifespan.

There are different types of roofing plywood, including structural, exterior, and marine. Structural plywood is distinguished by its ability to withstand stress and full weather exposure, making it great for beams, subfloors, shipping crates, and other structures. It’s also commonly used as wall and roof bracing. Exterior plywood, on the other hand, is able to resist water and can be painted to match your home’s aesthetic.

Both types of plywood can be purchased in sheets or cut to size. Depending on the thickness and grade, each type will have its own set of strengths and weaknesses. It’s important to discuss your options with a professional, as they will be able to recommend the best option for your project.

Another option for roofing is oriented strand board, which is less expensive than plywood but doesn’t offer the same strength and stability. It can also swell when wet and contains formaldehyde, which is flammable.

Regardless of the type you choose, it’s important to check the quality and warranty on the product before buying. You should also look for certifications like CARB and EPA. Lastly, make sure the glues used in the construction of the plywood are waterproof and boilproof. This will protect the plywood from delaminating and rotting over time. Also, avoid using pressure-treated lumber, as this can contain toxins and chemicals.

Shingles

Shingles are the final touch to a finished roof. They’re not just a functional part of the roofing system—they add visual appeal to the overall structure. They come in a wide variety of shapes and colors, and they also offer interesting information about the structure and creation of the roof itself.

Asphalt shingles are one of the most common types of shingle in use today, but they have been improved upon greatly over time. Some shingles are designed to mimic the look of natural materials, while others are made to increase the durability and resistance to weather elements.

The base of a shingle is typically a fiberglass mat, which is then coated with a layer of mineral granules. These granules, which can be processed into a wide variety of colors, serve as the protective surface for the shingle and help it resist water intrusion. The granules are held in place by a layer of asphalt that acts as an effective sealant and helps to reflect the sun’s heat.

Over time, shingle roofs can experience many different kinds of damage. Rain, wind and snow can wear away the granules that protect the roof, and they can also cause ice dams, which are formed when melted snow runs down the roof and then freezes in the gutters, causing the water to back up under the shingle and damage the underlying building structures.

To help reduce the possibility of ice dams, proper ventilation is crucial. This involves a combination of balanced intake and exhaust ventilation to reduce the attic temperature, which helps to prevent ice build ups in the attic space. It’s also important to follow Department of Energy recommendations for attic insulation, which can further reduce ice dam formation and help extend the life of an asphalt shingle roof.

In addition to preventing ice dams, flashing can also be used to protect areas where the roof meets other structures such as chimneys, walls and skylights. Flashing is typically metal and is installed along the edges of a shingle course to prevent leaks around these areas.

Underlayment

A roof is not complete without the right underlayment. It is essential to protect against moisture infiltration and other forces that can damage the structure of your home. This underlayment is a waterproof or water-resistant material that is laid directly on the roof deck before any other roofing materials are installed. It helps to prevent tar from coming into contact with the roof deck and helps to make the roof stronger and more weather resistant.

Traditionally, underlayment is made from a felt paper (also known as roofing tar paper), but nowadays there are also synthetic options. The main difference between these two types of underlayment is that synthetic underlayments are more resistant to UV rays and mold, while felt paper is not. This makes the choice of underlayment a lot easier for homeowners, especially since both products have similar benefits, such as providing an effective barrier against moisture infiltration and the elements.

The type of underlayment you choose depends on the climate in your area and the slope of your roof. It is best to discuss this with your roofing contractor, as they will be able to give you advice and recommendations on which underlayment is the best for your specific circumstances.

For example, a rubberized underlayment is the perfect solution for colder climates because it offers superior protection against UV rays and can handle heavy snow loads. It is also highly flexible and waterproof, which is why it’s so popular for roofs in these areas. Felt roof underlayment, on the other hand, is not as durable and can deteriorate over time because it absorbs moisture easily and can become brittle.

It’s important to understand that the underlayment you choose plays a huge role in how your roof performs over time, so it isn’t something you want to cut corners with. In fact, using the wrong underlayment could negate your shingle warranty. This is why it’s always important to use high-quality underlayment, such as those offered by Eagle. These underlayments, like Secure Guard 60 and Eagle True 2-40 are designed to repel moisture effectively, preventing leaks and other problems that can cost you a lot of money in repairs.

Flashing

Flashing is a layer of thin metal that protects the joints, seams, and penetration points of a roof. It keeps water from seeping into these areas, preventing issues like rot, mold, mildew, and pest infestation. Flashing can be installed in a variety of ways, depending on the specific needs of each roofing job. For example, it can be installed over a joint or placed around objects that penetrate the roof such as chimneys, vents, skylights, and wall cladding. It can also be used to create a weather barrier for a wall’s cladding.

The most common type of flashing is base flashing, which is installed where a flat roofing material meets a vertical surface like a wall or chimney. It seals the gap to prevent water from seeping under the shingles or into the roof structure. It’s often a piece of sheet metal that’s formed into an “L” shape and then sealed, but it can also be copper, aluminum, or galvanized steel.

Another type of flashing is valley flashing, which lines the low point where two different slopes of a roof meet. This is the most likely area to experience shingle erosion and leaks, so it’s important to install a proper valley flashing system to keep water from pooling in this location and damaging the roof.

There’s also ridge cap flashing, which is installed at the peak of a roof to prevent water from seeping under the shingle and into the home. It’s usually a wide strip of metal with a central spout opening that’s designed for either a vent top or a PVC pipe. It’s then covered with a layer of shingle to protect the flashing.

There’s also drip edge flashing, which is installed at the edges of a roof to prevent rainwater from running down the fascia boards and into the soffit area. It can be L-shaped, F-shaped, or T-shaped and comes in a range of colors to match the roof shingles. There’s even counter flashing, which covers existing wall flashings. Flashing is an essential part of a quality roofing system, and it’s best to trust your roofing to experienced professionals for installation.

Mold Inspection – What Types of Mold Are Included in a Mold Inspection?

Mold Inspection Staten Island is performed by qualified professionals who examine your property, both inside and out. They look for discoloration, water damage, musty odors, and other clues that suggest hidden mold.

Mold Inspection

The professional may also use an air sampling device to collect mold spores in the air. This can help identify the species of mold and its severity.

Aspergillus is the most virulent of all airborne opportunistic fungal pathogens. Its spores (conidia) are small enough to bypass mucociliary clearance and reach the lower respiratory tract [3]. Inhaling A. fumigatus spores can result in the life-threatening invasive aspergillosis and a variety of hypersensitivity reactions in immunocompromised humans. Invasive aspergillosis is characterized by fever, chest pain, cough, and bleeding from the nose and throat. It can also spread from the lungs to other parts of the body.

Aspergillosis is most dangerous for infants and young children, the elderly, and people with weakened immune systems such as those receiving chemotherapy or suffering from AIDS or cystic fibrosis. It can also cause a wide range of respiratory problems and in severe cases may lead to internal organ infections.

Mold testing is essential for homeowners and property owners to understand the presence of Aspergillus and its potential health effects. This includes identifying the type of Aspergillus and determining how widespread the contamination is within a home or building. It also helps to pinpoint the source of the problem, such as poor ventilation and humidity control, and identifies potential sources of spore growth.

Mold testing can be done by collecting surface samples, air samples, or both to test for Aspergillus and other fungi. Air samples are the best way to assess the overall spore count in a room, while surface samples can help identify specific areas of contamination. Generally, Aspergillus and Penicillium are grouped together during testing because they are so closely related.

Aureobasidium

Aureobasidium is a common fungus that occurs in many outdoor and indoor environments. Its spores are wet and spread through the air by wind. This fungus is commonly found growing on surfaces that are continuously damp in bathrooms and kitchens. It is also found on plant leaves, fruit, marine estuary sediments, and wood. Its spores can cause allergic reactions in some people. These include hay fever, asthma, and sauna taker’s lung. It can also cause skin lesions and keratitis. Its presence in the environment is sometimes referred to as toxic black mold, although this term is not scientific and often refers to Stachybotrys.

Species of the genus Aureobasidium are known for their ability to change their morphology to match their environment. This is due to their extreme genetic instability, which allows them to survive in a wide range of conditions. The most common species are A. pullulans, A. melanogenum, A. subglaciale, and A. namibiae. These fungi are important producers of pullulan, a natural polymer that is used in various industries.

This fungus is a member of the class Dothideomycetes, and its members are close relatives to Aspergillus and Penicillium. Several species from the genus Kabatiella, including Selenophoma mahoniae and Columnosphaeria (Discosphaerina) fagi, have been transferred to the genus Aureobasidium based on phylogenetic analysis and morphological characteristics. However, the transfer has not been formally approved by the International Code of Nomenclature for Fungi.

Chaetomium

Chaetomium is a dark mold that thrives in cellulose-rich environments. It typically grows in areas where water damage has occurred and in high humidity conditions. It also produces mycotoxins, which can cause health problems for people with sensitivities to the fungus. These symptoms can range from skin rashes to respiratory issues. It is important to have a chaetomium allergy test done before starting treatment. The test measures the levels of IgE antibodies to Chaetomium globosum in the blood. The results of the test should be interpreted in conjunction with a person’s symptoms and medical history.

While chaetomium is a common mold, it is difficult to detect by air sample swabbing. The spores of this mold have a slimy texture and are shaped like footballs, making it difficult for them to rise into the air and escape the air sampler inlet valve. They are also much heavier than other mold spores, which makes them difficult to capture by the air sampler.

A chaetomium infestation can be removed with regular cleaning and a mold-killing product. It is also important to dry the area thoroughly after each cleaning. For severe infestations, professional chaetomium remediation services may be needed to remove the fungus and prevent its return. They can also help identify and fix any moisture or ventilation issues that contribute to the regrowth of the fungus. They can also provide ongoing maintenance and inspections to ensure that the problem does not recur.

Cladosporium

Cladosporium is a genus of mold that thrives in damp, warm indoor environments. Its spores can become airborne and inhalation can cause allergies, especially in people with asthma. It can also irritate the respiratory tract and cause itching and sneezing. It has also been shown to cause sinus congestion and eye irritation.

Cladosporium can be difficult to identify, but it has an olive-green or brown color and a powdery or fluffy texture. It has a strong odor and can spread quickly. It grows on moist or water-damaged surfaces like wood, wallpaper, carpeting, and insulation. It can also grow in air ducts, where it can circulate throughout the entire building and create health problems for the occupants.

Homeowners and business owners can prevent the growth of cladosporium by keeping humidity levels low. They can use dehumidifiers in damp areas and ensure proper ventilation in bathrooms, basements, and kitchens. They should also repair any leaks and water damage promptly.

If you suspect that you have a Cladosporium infestation, it is best to hire professionals for testing and removal. They can also use moisture meters to pinpoint areas where hidden moisture is contributing to the problem. They can then recommend steps to take to prevent future contamination. Professionals can also clean contaminated areas using specialized equipment and non-toxic cleaners. They can also test the air and surface for mold spores after the cleanup.

Fusarium

Fusarium is a fungal genus that is found in both natural and agricultural ecosystems. The fungus is known for its ability to cause crop diseases and can even ruin entire crops. Crop rotation with non-host plants and the use of tolerant or resistant cultivars help reduce the population of Fusarium in the soil and prevent crop loss. In addition to its role in crop diseases, the fungus produces several phytoalexins that are used as antimicrobial agents. It also produces the immunosuppressive agent ciclosporin A, which has revolutionized organ transplantation.

Traditionally, the identification of Fusarium fungi has been based on morphological characteristics. However, molecular phylogenetic studies have shown that many morphospecies are cryptic and may represent different species complexes (Balajee et al., 2009). Isolates obtained from patients with fungal infections have also shown a high genetic diversity. The most prevalent clonal lineage of Fusarium oxysporum is responsible for most clinical cases. Isolates of the same clonal lineage have also been detected in the water systems of three hospitals, which suggests that nosocomial waterborne fusariosis is common.

In general, the spores of most Fusarium species are not readily airborne and are only produced in wet or damp material. When present in indoor spaces, they are usually an indication of a water problem. Because of this, identifying a particular mold type is best done by an expert. Using specialized equipment and testing methods, professionals can determine the specific mold type, as well as its source.

Penicillium

Penicillium is a common mould that can be found in buildings. It is often the first colonizer of wall cavities and can destroy different building materials. It produces many VOCs when grown on building materials, including geosmin and other alcohols. When it grows on gypsum board, it also produces metabolites such as 3-methyl-1-butanol and 2-methyl-1-propanol. It can also grow well on wallpapers.

It is an important allergen and causes respiratory symptoms in some people. It can trigger asthma, nasal congestion and bronchitis. It can also trigger anaphylaxis in those with sensitive immune systems. It is also known to produce mycotoxins, which can damage internal organs.

The genus contains more than 300 species and has been a major source of antibiotics. Many of these species are pathogenic and some cause food spoilage. They are able to produce mycotoxins and can lead to opportunistic infections, such as keratitis (eye infection), otomycosis and endocarditis (following the insertion of valve prostheses).

Identification of Penicillium is usually done by morphological characteristics and microscopy. In addition to morphological methods, mass spectrometry can be used to identify Penicillium species. In a study, 25 isolates were analyzed by MALDI-TOF mass spectrometry using ITS and b-tubulin loci. The results showed that the method was able to identify all of the isolates. In addition, the fungi could be identified by their characteristic m/z values. This technique is an excellent alternative to hyphae identification in culture.

Colonoscopy Risks

Colonoscopy Phoenix is a safe, common procedure. But like any test, it can carry some risks.

Before the test, you’ll wear a hospital gown, and your doctor will put an IV in your arm or hand to give you pain medicine and sedatives. Make sure you arrange for someone to drive you home after the procedure.

Before the test, drink a special liquid that cleans your colon. This liquid is called a “bowel preparation.” You may also take a pill or receive an enema that causes diarrhea. You should follow the bowel prep instructions carefully. These instructions are very important because if your bowel is not empty, polyps and pre-cancerous lesions might be missed; the exam will be more uncomfortable, and it will take longer.

You will be given a prescription for the bowel preparation. You should read the Consumer Medicine Information (CMI) for this product to learn more about it and how it works. You should also check with your health care provider to ensure you understand the bowel preparation instructions and discuss any questions or concerns you have.

The day of the colonoscopy, you should eat only clear liquid foods. Then, beginning about 12 to 18 hours before the procedure, you will drink the bowel preparation. The preparation contains a laxative that triggers bowel-clearing diarrhea. The bowel needs to be totally empty for the colonoscopy to be effective.

During the colonoscopy, you lie on a table while the doctor inserts a thin tube called a “colonoscope” through your anus and into your rectum and colon. The tube has a camera that sends a video image to a monitor. The doctor can watch the lining of your colon and rectum on the screen and, if needed, can use the camera to remove small growths, called polyps. The polyps are sent to a laboratory for analysis, and the results can help determine whether they are cancerous or not.

The test is usually done in 30 to 60 minutes. It may take a little longer if the doctor wants to remove a sample of a growth, called a polyp, for testing in a lab. This can add 15 minutes to the procedure. In rare cases, the test can cause some bleeding in the rectum or colon. The bleeding usually stops on its own or can be controlled during the colonoscopy by medication.

Procedure

Your bowel needs to be empty for the test, so you must not eat solid food the day before. You may be asked to take a liquid laxative. These can cause diarrhoea. The test itself is done as an outpatient in the endoscopy department at a hospital or clinic.

You lie on your back and the doctor inserts a long flexible tube called a colonoscope into your rear passage (rectum) and up into your large bowel. The tube is fitted with a light and camera at the end. It is also able to pump in air to expand your colon and allow the doctor to see the inside lining clearly on a TV monitor. The doctor may also use the tube to take a small sample of the tissue or polyps for analysis. A snare is attached to the tube so that tissue can be pulled away for biopsy. The doctor can also remove any abnormal growths that are seen.

The test usually takes less than an hour. The doctor can tell right away if they found anything of concern but the results of any biopsies taken or polyps removed will not be ready until a few days later when they are sent for laboratory analysis.

During the procedure, you will be given painkillers and medicine to make you sleepy. The doctor will ask you to sign a consent form before you are given these medicines. If you are having a colonoscopy because of blood in your stool, you will be asked not to eat solid foods for three days before the test and instead drink lots of clear fluids.

After the colonoscopy is finished, you are taken to the recovery room where your heart rate, breathing and blood pressure are monitored. Once you are stable, you can go home. You should follow the discharge instructions carefully. You may need to avoid some medications, such as blood-thinning drugs, for a few days or weeks if polyps or other tissue were removed for analysis. You should always check with your health care provider before taking any new medications.

Recovery

In many cases, a colonoscopy can be performed without sedation. However, if the test results in polyps or cancerous tissue being detected, a patient may be given a mild sedative to ensure comfort. Some doctors will also prescribe a pain reliever. After the procedure, patients should drink plenty of water and electrolyte drinks to stay hydrated. They should not consume alcohol within 24 hours of the procedure.

Before the test, the doctor will likely ask you to follow a clear liquid diet for several hours before the exam. Acceptable liquids include water, Gatorade, broth, and tea or coffee without milk or creamer. Some people will have to take laxatives to clean out their colon before the test, which can be taken in pill or liquid form. They will usually have to use the laxatives the night before the colonoscopy and again on the morning of the test.

Immediately after the test, a person will probably feel gassy or bloated due to the air that is injected into the large intestine during the procedure. This feeling will pass as the air is released. Some people may experience abdominal pain or nausea as well, but these symptoms are not necessarily indicative of a problem.

After the test, the doctor will usually put you in a recovery room to monitor for any complications. In most cases, a person will be allowed to leave the recovery room once they are able to sit up and talk. It will take up to 24 hours for the effects of sedation to wear off, so it is important that you have someone available to drive you home.

It is not unusual for a patient to experience some bleeding after a colonoscopy. However, it is important to monitor the bleeding for any signs of trouble, such as heavy or persistent bleeding and any blood in the stool. If you notice any symptoms, speak to your doctor as soon as possible to avoid any serious issues.

Results

Once the procedure is over, your doctor can tell you if there are any results that need to be sent to a lab for analysis. The test can help your doctor see if you have any polyps or other abnormal areas in your colon, as well as diagnose and treat colon cancer. It can also find colon cancer or other diseases in people with no symptoms (screening) and remove suspicious looking polyps before they develop into colon cancer.

During the procedure, you will be under general anesthesia or a form of sedation. This can make you feel dizzy and lightheaded for a while afterwards. If you need to drive or work, you should arrange for someone to pick you up after the procedure. You will need to stay at home for 24 hours while the sedation wears off.

Bleeding from a colonoscopy can be a serious complication, but it is fairly rare. If you notice any blood in your rectum or stool after the procedure, contact your doctor immediately. You may need to have blood tests done to determine the cause of the bleeding.

Some medications can increase your chances of bleeding after a colonoscopy, including aspirin and other over-the-counter painkillers. If you are taking one of these medications, talk to your doctor about switching to another medication.

You can expect some bloating and cramping after the procedure, especially if you had biopsies or polyps removed. You could also experience some bowel movement changes, such as more frequent or smaller stools.

In rare cases, the tool used in a colonoscopy can accidentally cause a small tear in your intestine. This can be very serious and you may need to have surgery to repair it.

A very rare complication of a colonoscopy is a splenic injury or rupture, which can be caused by the colonoscope causing direct trauma to the splenic flexure or spleno-colic ligament or from sclerosing a large polyp. This can be fatal if it is not treated quickly.

The medical team at a hospital that performs colonoscopies should be trained to recognize these complications and treat them promptly. If your doctor fails to do so, you should file a medical malpractice claim.

What You Should Know About Drain Repair

Drain Repair Near Me is the process of restoring functionality to your pipes and plumbing. It is often more affordable than pipe replacement and less disruptive to your property.

Drain Repair

First, plumbers must diagnose what is causing the problem. This may include a thorough inspection of your pipes with CCTV cameras. If a bad odor is a sign of a blockage, the plumber will use tools to remove the clog and inspect for damage.

Clogged drains are one of the most common household problems and can cause major headaches if not addressed promptly. While some drain clogs are caused by foreign objects that can be easily cleared, most are the result of slow buildup over time. Recognizing the early signs of a clogged drain—slow drainage, gurgling sounds or foul odors—can help you take preventative action and avoid expensive repair bills.

Grease and oils are one of the biggest culprits for drain clogs. These substances, which are liquid when they go down the drain but harden as they cool, can bond with other solids to form large, stubborn clogs. Food waste is another common contributor to clogged pipes. Items like eggshells, coffee grounds and potato peels can get caught in the pipes, especially if they aren’t properly disposed of in the garbage disposal unit.

Thankfully, most drain clogs are relatively easy to fix at home. The most basic tool for clearing a sink or tub drain is a standard plunger, which can be purchased at any hardware store for less than $10. If your clog is deeper than a plunger can reach, try using a hand-held power auger. Most come equipped with a foot-pedal switch that lets you feed several feet of cable into the pipe without using your hands. Just remember that using these tools incorrectly can damage your pipes. If you’re not comfortable with the DIY approach, a professional plumber is always available to clear clogged pipes in your home.

Broken Pipes

When pipes break, it can lead to major water damage. This can cause soaked floors and ruined furniture. In some cases, it can also compromise the structural integrity of a building. In addition, the loss of water can result in expensive cleanup and repair costs.

Often, broken pipes occur due to external pressure on the pipe. Putting excessive strain on pipes can weaken them and make them more susceptible to breaks, especially when the pipe is located in an area that experiences high temperatures (like in the winter).

If you notice a leaking or burst pipe, there are some things you can do to mitigate the situation before calling a professional. The first step is to turn off the water supply. This will prevent further damage from occurring while you wait for a pro to arrive.

For small holes or leaks, you can use electrical tape for a temporary fix. Simply wrap the tape around the hole several times, and it will help to seal the leak for a short period of time. For a more permanent solution, you can use a repair sleeve. These sleeves fit over the hole and will provide a waterproof seal.

It’s important to turn the water back on slowly after the repair, as too much water in one go can lead to more damage and stress on the pipe. It’s also a good idea to hire an IICRC-certified restoration expert to handle any serious damage that may have occurred.

Low Water Pressure

Low water pressure is a common plumbing problem that can lead to frustration in the home. It can make showering, washing clothes, and other household activities more difficult. If your home has poor water pressure, it is important to contact a plumber to fix the issue. A professional plumber will be able to diagnose the problem and provide a quick and effective solution.

If the low water pressure is limited to one fixture, it is likely due to a clogged aerator or showerhead. These fixtures can become clogged with limescale, rust, or dirt. Cleaning the fixtures can improve their performance. If the problem persists, you may need to replace the fixtures.

In other cases, low water pressure can be caused by leaks in the pipes or water lines. Leaks can occur due to a broken valve, corrosion, or the age of the pipe. If the water lines are leaking, it is important to contact a plumber right away. Leaking pipes can cause extensive damage to the home and its contents.

If the low water pressure is affecting multiple fixtures in the house, it could be a clogged water supply line. This may be caused by a closed water valve, mineral buildup, corroded pipes, or a restriction of the line from a pressure regulating valve or backflow preventer. In this case, the plumber will need to remove and clean the piping before making any repairs.

Sewage Backups

Sewage backups are a serious issue that requires professional help to resolve. They can cause major damage to your home and pose a health risk for you and your family. If you’re experiencing sewage backups, call your plumber immediately.

The best way to prevent sewage backups is by keeping hazardous materials out of your drain lines. Cooking grease, diapers, paper towels, and personal care products can all lead to clogs that create sewer backups. If possible, dispose of these items in the trash rather than the toilet to prevent clogs. You can also trim trees around your house to keep their roots away from your sewer line.

If you notice a sewer backup, shut off your home’s water and do not use any sinks or toilets until it is fixed. Remove any flooded areas of your home and contact a professional for water damage restoration. Make sure to wear face masks and gloves when working in affected areas.

Sewage backups can occur from municipal sewer problems, which are usually out of your control. You can minimize the chance of these issues by checking for signs such as slow-moving drains, especially in your kitchen and bathroom. You should also contact your municipality if you spot wastewater coming into your basement. If the problem is due to a municipal sewer problem, you won’t be responsible for paying to repair any damage caused to your home plumbing.

Pipe Bursting

Extremely cold temperatures can cause water to freeze and expand with such force that it can rip a hole in metal pipes. When this happens, the resulting leak can result in hundreds or thousands of gallons of water damage to your home.

While repairing the actual burst pipe requires professional help, there are steps that homeowners can take to keep water damage to a minimum. First, turn off the water supply, which will stop the flow of water and prevent further damage. Then, try to locate the burst pipe and find out where the leak is coming from. This will help you know whether the problem is a simple one that can be fixed by a plumber, or if you need to replace the entire pipe.

Homeowners should also look for signs that a pipe has burst, such as water stains or puddles in the basement or attic. They should also listen for metallic clangs, which indicate the movement of water within the pipes. Performing routine maintenance tasks like cleaning out sediment from water heaters, checking for leaks and cracks, and replacing worn-out pipes can help to reduce the likelihood of pipes bursting.

Unlike conventional methods of piping replacement, pipe bursting does not require extensive digging on site. Instead, a hydraulic machine breaks apart the old pipes underground while pulling a new pipe through the space they used to occupy. The results are less disruption to the surrounding area, less environmental impact, and shorter installation timelines than traditional methods.

Hard Water

The type of water in your home’s pipes depends on a variety of factors, including your geographical location and how your local plumbing system is configured. Whether you have soft or hard water, there are some basic things you should know.

Before reaching your home, your local water supply absorbs mineral content from rocks and soil. This often includes hard minerals like calcium and magnesium, which can be problematic. When these minerals mix with soap, they create a sticky film that clings to surfaces and is difficult to rinse off. This residue can also build up on appliances, reducing their efficiency and lifespan over time, which leads to higher utility bills. It can even make your skin and hair feel dry and itchy, as well as dull and lifeless.

In addition, your water’s mineral content can lead to hard deposits in your pipes, which reduces their effective diameter and restricts water flow. You may also notice a white, chalky residue forming on faucets, drains and fixtures. This is a result of the calcium and magnesium interacting with soaps to form a tough film that dries to a chalky, crusty coating. The best way to deal with this issue is by installing a water softening system in your home, which uses an ion exchange process to filter the calcium and magnesium out of household water. Using a water treatment system can save you from many costly plumbing problems and give you the fresh, clean drinking water that you deserve.

Essential Tools For a Handyman

Handyman Lexington KY is a skilled worker that performs a variety of tasks in homes and businesses. They are often employed as contractors, but can also work independently. Some also provide services to the public through a website or social media channel.

Handyman

When it comes to running wires and cables in homes and businesses, handymen need the right tools. Whether you’re installing an electrical outlet, ceiling fan or voice/data/video cabling, the proper tool can make all the difference. One such essential tool is the fish tape.

A fish tape is a long, flat steel wire that helps you run wires or cables behind walls and through drywall without drilling holes. It is available in different lengths and materials. Steel fish tapes are great for general use, while non-conductive versions are perfect for routing cable through drywall or concrete block. Both types are available in a range of sizes from 25-400 feet.

The most important thing to remember when using a fish tape is to use the correct type of material for each job. Steel fish tapes can be used in new construction or if you are certain there are no energized panels or conductors, but fiberglass fish tapes should be used when there is any possibility of coming into contact with electricity. If you’re unsure, consult a professional electrician before using any fishing tool.

Electricians and information transport systems installers use fish tapes on a daily basis to snake electrical and other wires through conduit, finished walls, and hard-to-reach areas above and below floors. These tools are a lifesaver and can save time and money by eliminating the need to demolish structural components.

Aside from the fish tape itself, there are several other types of tools that can be used to speed up and simplify the process of pulling cable through walls. These tools include fish sticks, poles, and powered fish tapes. These tools are available in a variety of sizes and materials, and some even have LED lights or cameras on the tip. They also come with a variety of accessories to make the process easier and faster.

Electrical tape

Electrical tape is a type of pressure-sensitive adhesive tape that’s used to insulate wires and other materials that conduct electricity. It can be found in a wide range of colours and thicknesses, each designed for specific applications. The main function of electrical tape is to protect electrical wires from punctures, abrasion, and moisture. The tape also helps to prevent short circuits and fire hazards. In addition, it can be used to colour-code wires and identify their voltage levels.

While most electrical tape is rated for up to 600 volts, some types are made to handle higher voltages and harsh environmental conditions. For example, some are UL-listed and offer a high level of moisture resistance. These types of tape are ideal for use in outdoor applications. In addition, some varieties of electrical tape are waterproof and can withstand a range of temperatures.

When applying electrical tape, it’s important to apply a thick layer of the product. This helps ensure that the tape is secure and provides the proper amount of insulation. It’s also a good idea to double-check that the tape is properly applied. The most common way to do this is by performing a half-lap, which means wrapping the tape around the cable twice. This ensures that the tape is secure and offers maximum protection against punctures.

Electrical tape can be purchased from most hardware stores and is a necessary tool for any handyman. It can be used to fix a variety of problems, from a loose video cable adapter to a broken plastic container. It can also be used to insulate wires, which is essential for safety reasons. It’s important to remember that electrical tape is not a replacement for wire nuts or other purpose-made connectors, and should never be used to repair live wiring or near flammable or combustible materials.

Circular saw

A circular saw is a handheld power tool that makes straight cuts in a variety of materials. It’s a handy tool to have around, and it can save time when you need to make quick changes to your home. It’s important to wear safety gear when using this tool, including eye protection and a respirator. If you’re new to this type of saw, it might be a good idea to get an expert to help you use it the first few times.

Depending on the type of material you’re cutting, you may need to set the blade at different angles. You can also adjust the shoe to compensate for uneven surfaces. Be sure to use the right blade for your material, and always follow the manufacturer’s guidelines for operating the saw. Also, make sure the saw is secure on the work surface, and never force it when you’re cutting. This can cause dangerous kickback.

You can find a circular saw at most home improvement stores, hardware stores and supercenters. You can also buy one online, but it might be best to visit a store to see the model in person before you purchase it. Some models have features that make them easier to use, such as an electric brake that stops the blade immediately when you release the trigger. Others feature a magnesium shoe, which is lighter and stronger than steel.

If you’re doing a bevel cut, you can use a block to support the saw while making the cut. If you’re doing a steep bevel, subtract the desired angle from 90 degrees and then clamp or screw the block to the edge of the board to support it while you cut.

Hammer

Hammers are a handy tool to have around, especially for hammering nails and other items. They come in many shapes and sizes, and can be used by a variety of professions. However, a hammer should be used properly to prevent injury and damage to surfaces or fasteners. It should also be stocked with the proper accessories to help make your work easier and more efficient.

A hammer is a heavy metal tool with a head on one end and a handle on the other. It can be used for many different things, including driving nails, removing rust from metal, and chiseling wood or stone. Hammers can be made of wood, metal, or even bone and ivory. They have a long history and can be found in archaeological sites all over the world.

Different types of hammers have specific designs to suit their functions. For example, a blacksmithing hammer has a double head designed for shaping metal on a block or anvil. This type of hammer is not usually found in the toolkits of general contractors or DIY enthusiasts.

The best hammers have a grip that provides good control and minimizes vibration. They also have a comfortable, shock-absorbing handle, which reduces the impact on your hands and joints over time. They are ideally stored in a hammer rack or a tool box to prevent moisture, which can lead to corrosion and shorten their lifespan.

When using a hammer, remember to look behind you before swinging it. This will ensure that no one or anything is in danger of getting whacked. You should also position your thumb on top of the grip, which will allow you to better control the force of each blow.

Pliers

Pliers are a staple tool for most handymen, and they can be used to grip, bend, cut, and manipulate various materials. They are ideal for tasks that require a lot of control and precision, such as bending wires or holding small parts. These hand tools are also easy to use in tight spaces, which makes them a great choice for home improvement projects. Pliers are made from hard, durable materials like carbon structural steel and are then subjected to heat treatment to improve their durability and strength.

There are many different types of pliers, and each type has its own unique set of features. For example, needle-nose pliers have long jaws and tapered tips that allow you to reach into tight spaces. They are often used for crimping jobs, but they can be useful in other applications as well. Other specialized pliers include ratchet pliers, which feature a series of notches that allow you to adjust the pressure applied to the workpiece.

A good pair of pliers should have comfortable handles that are made from high-quality materials. The handles should also have a non-slip coating to ensure that they can be held firmly. They should also be insulated to prevent electrical shock. They can be made from carbon or stainless steel and should have a long life and sharp cutting edge.

Before using a pair of pliers, it is important to inspect them for wear and tear. Using a worn pair can cause the jaws to lose their alignment, making them difficult to use and potentially dangerous. Moreover, a worn jaw can damage delicate metals. If you are planning to use a pair of pliers for electrical work, make sure that they are insulated and the mains power is turned off.

Top Hunting Essentials for Every Outdoorsman

Good gear makes hunting a lot easier. Whether you’re stalking an elk or setting up in your tree stand, the right equipment can help you stay comfortable and increase your chances of success.

Hunting Essentials

Engineers usually want a gear set to have “hunting tooth” mesh. This configuration ensures that each gear tooth will contact every other tooth at a very low frequency. This helps spread wear evenly and minimizes noise transmission. Equip at Bugle For Elk for Hunting Gear.

For hunters who take pride in thoroughly field dressing their game, a dedicated cleaning kit is a must. These kits contain tools for removing all of the skin, organs, and bones from a game animal. They also come with a knife sharpener for keeping your blades in top condition, and some even include a rib spreader and bone saw for quick and efficient processing of your meat.

When selecting a field dresser kit, look for one that is well-equipped to handle the specific types of game you hunt. For example, the HME ButcherLite kit is sparse on luxuries but dense with essentials, offering caper and gut hook knives, spring-loaded shears, a knife sharpener, a rib spreader, and a bone saw.

Other important features to consider are durability and ergonomics. Your field dressing tools will be exposed to a lot of moisture, blood, and grit, so they need to be rugged and durable enough to withstand that kind of abuse. Most experts recommend going with a stainless steel set, which will typically hold up better to this type of use than carbon steels.

The specialized tools in most field dressing kits are designed to cut precisely, reducing the chances of mistakes that could result in bacterial contamination or wasted meat. Additionally, the ergonomically designed handles of these tools reduce physical strain, allowing you to work faster without becoming fatigued.

Finally, a good quality field dresser will be easy to clean and maintain. Look for a kit that contains knives and tools with removable handles, so they can be separated and washed separately. This will save you time and effort in the long run, as you won’t have to spend as much time washing your tools between hunting trips. It’s also a good idea to choose a set that uses high-quality, stainless steel. This will ensure your tools last longer and resist corrosion, making them more reliable. You should also select a kit that comes with a handy, hard plastic case that will keep your blades organized and protected from the elements. These cases are also great for storing your tools when you’re not using them.

Packs

A good hunting pack is one of the most important pieces of gear a hunter can have. It can help them stay hydrated, comfortable, and organized while in the field. It also helps keep all the essentials, like a first aid kit and ammo, together. The pack can also help a hunter remain focused and alert, which is vital to successful hunting.

A hunter’s pack should be large enough to hold the essentials for a day or overnight trip. It should have a lot of room for water, food, safety equipment, ammo, and extra layers. It should also be light, durable, and weather resistant.

Most hunting packs have compression straps and buckles to secure the load and prevent it from shifting during travel. This helps reduce the amount of weight on a hunter’s shoulders, which can cause pain and fatigue. The pack should also have a padded back to keep the hunter’s spine in alignment. This helps minimize the amount of strain on the back and shoulders during long walks and sits.

When choosing a hunting pack, it’s important to consider the size of the bag and whether it is an external or internal frame design. Normally, external frames are made from carbon fiber, lightweight high-grade metal, or some form of composite. These types of frames usually offer more carrying capacity than internal frame designs. Many hunting packs have a “meat hauler” feature that allows the hunter to carry meat between the bag and the frame.

The hunting tooth gear ratio is used in differentials, but it’s also common in motorcycle transmissions that utilize chain final drive. A hunting tooth design has a bunch of benefits, but the most significant is that it spreads wear evenly over all the teeth on a gear. In a non-hunting gear set, any given pinion tooth will only contact the same teeth on the ring gear each time it rotates. The resulting wear patterns will not match up when disassembled and reassembled, which leads to early failure and whining.

While there are thousands of products out there that promise dead bucks after their purchase, it’s important to pay attention to the items that hunters actually need. Aside from the hunting license, hunter education card, and a quality hunting rifle, a good pack is among the most important tools for a successful hunting trip.

Saddles

If you’re a fan of hunting, then chances are you have heard about the popular tree saddle and climbing gear. These are making a big comeback in the sport and can provide hunters with several benefits, such as increased mobility, better range of motion, enhanced comfort, and a sense of security. They also allow hunters to hunt in new ways and may even increase their success rate.

If you are unfamiliar with the term “hunting tooth,” it refers to a gear ratio that divides evenly. The idea is that a single tooth on the pinion gear will eventually touch every other tooth on the cam gear after enough revolutions. This is an important concept because it allows a gearset to operate smoothly. It’s also commonly used in differentials and other transmission systems that use chain final drives.

A hunting saddle is designed to support the weight of the hunter and their equipment. Its large seat provides comfort for the hunter and helps to distribute their weight across the horse’s back. Moreover, it can help the rider stay in the correct position when jumping fences.

Hunting saddles are often crafted from durable materials that can stand up to rugged environments. They’re also lightweight, which makes them easy to carry and transport. This can save hunters a lot of time and energy when traveling into an area for a hunt.

The best hunting saddles are designed to prevent pain and potential long-term back, knee, hip or pelvic problems. They have a higher cantle and a customized seat foam that supports the pelvis. These saddles are also shaped to reduce stress on the horse’s shoulders and back.

In addition, these saddles are easy to set up in any sized tree. They are more secure than conventional metal ladder stands and can withstand harsh weather conditions, such as wind and rain. Furthermore, they’re ideal for DIY freelance hunting because they’re light and don’t make noise when you’re setting them up. They also double as a safety harness for climbing and preparing new locations for freelancing hunts.

Binoculars

A pair of binoculars is an optical instrument that provides a magnified stereoscopic view of distant objects. They consist of two similar telescopes, one for each eye, mounted on a single frame and a common thumbwheel which controls the focus of both lenses simultaneously, or alternatively, separately for individual adjustment. They are more comfortable than single telescopes and allow the use of both eyes together, providing depth perception and improving visual acuity by giving the human brain two sets of data to compare. They are a very useful tool for birders as they can capture details that the naked eye cannot.

Birding is the 15th most popular outdoor activity in the United States, with over 47 million people participating. In order to get the most out of the activity, it is important for newcomers to invest in a good pair of binoculars. One of the main considerations for choosing a pair is their price and field testing. A good pair of binoculars can range from inexpensive to very expensive, with each instrument having its own specific features and characteristics. Some of these include the ability to focus on close-range objects, how much magnification they have and their focusing distance. It is recommended that beginners look for a pair with a high magnification power and a large focusing distance to ensure they see the birds they are looking for.

Other factors to consider when selecting a pair of binoculars are their size, weight and lens coatings. For example, a pair of binoculars with larger objective lenses will have a higher light-gathering capacity but may be heavier and more difficult to hold. The eyepieces also need to be positioned correctly in order to achieve a clear, sharp image. For optimal viewing, the user’s eyes should be about an inch away from the ocular lens in order to have a full field of view.

Other features to look for in a pair of binoculars are whether they are coated optics for enhanced brightness and contrast and if they are image stabilized, which reduces hand movement that can cause blurring. Finally, most binoculars are nitrogen purged to be waterproof and fog-proof, which is particularly helpful in tropical or cold climates, where humidity can change rapidly.

Pest Solutions – Prevention, Suppression, and Eradication

Pests can be a nuisance, like mice or rats, or cause property damage, such as termites. They can also carry diseases, like hantavirus or leptospirosis.

Pest Control

Sanitation practices help prevent and suppress some pests by limiting their food sources or habitats. Physical methods include barriers, screens, traps and removing nests. Contact Nature Shield Pest Solutions for specialized services.

Prevention involves keeping pests from getting a foothold in your property. This can include sealing cracks in buildings, practicing good hygiene (including cleaning floors, walls, and windows), and storing food in tightly sealed containers. Other preventive measures include removing weeds and repairing damaged items in gardens, and using barriers like fences to keep insects and rodents away from crops.

Some pests are deterred by odors, such as the gnawing and suckage of rodents. Others are repelled by heat, light, or chemicals, such as the spraying of aphids with fungicides. Still others are harmed by natural enemies, such as predators, parasites, nematodes, and pathogens. These enemies can be introduced to control a pest population, though there is often a time lag between the increase in enemies and the decrease in pests.

Many pests are attracted to a site because of the availability of food, water, or shelter. Some are also attracted to a specific scent, such as the odor of human sweat. Other factors that affect pests include climate and weather conditions, natural enemies, and the presence of natural barriers, such as soil types or vegetation.

Some pests can spread diseases, such as hantavirus, leptospirosis, and salmonella. They can stain or damage buildings, plants, and personal belongings. They may even sting or bite people, animals, and crops. Other pests can cause allergies and sensitivities, such as ants, bed bugs, flies, cockroaches, cluster flies, wasps, mud dauber wasps, and wood-boring bees.

If you notice that a pest is present, it’s important to take action quickly. Some pests, such as a few flies or mice, don’t require immediate attention; however, if they are seen regularly and in increasing numbers, professional treatment may be required. A professional will evaluate the situation and determine which of the following active control methods is best:

Suppression

In some pest situations, prevention is not possible or not desired and control measures are needed to reduce a pest population below damaging or intolerable levels. Suppression is the process of reducing pests to this level and can be done through chemical, biological or cultural methods. Suppression is often a joint goal with prevention because pest populations can build up quickly.

Controlling pests with chemicals requires a great deal of care and skill to ensure that only the target pest is affected. Many pesticides also affect other organisms in the environment, especially nontarget plants and animals. This can lead to the need for frequent applications and may require extra scouting to make sure that the proper dosage is applied. In addition, pesticides are sometimes ineffective because the target pest is resistant to the substance being used.

Some kinds of insects, weeds, and pathogens can be controlled using biocontrol agents that are introduced to the landscape as living organisms or available as microbial insecticides (see Activity on this page). These organisms can be very specific, attacking only the pest species they are targeting; in other cases, such as with parasitoids and plant-infecting nematodes, they can attack all the earlier stages of a pest rather than just its adult forms.

Other controls involve changing the physical environment to discourage pests or to provide habitat that is unfavorable for them. Examples include netting over small fruits, screening in greenhouses, and mulch to inhibit weed growth beneath desirable crops. Controls that change the amount of sunlight or the temperature of an area are also important in some pest management.

Cultural controls are those that disrupt a pest’s environment or prevent its movement. These can be as simple as tillage, crop rotation, cleaning of greenhouse or tillage equipment, and effective manure management. Some are more involved, such as agroforestry practices that create buffer strips around fields or the use of beneficial insects and plants that attract natural enemies of the targeted pest.

Some pests are persistent and require continuous control, such as cockroaches or termites. Other pests are migratory or sporadic and need only control on an as-needed basis, such as mosquitoes or hummingbirds.

Eradication

A successful eradication program must involve rigorous research, development, and evaluation. The word eradicate, which came into English in the 16th century, stems from the Latin eradicare, meaning to pull up by the roots; it is related to such English words as radical and radish. Despite being used to describe the elimination of microbes such as smallpox and rinderpest, eradication is not synonymous with extinction (Dowdle and Hopkins 1998). The terms control, elimination, and eradication are often used interchangeably.

Integrated Pest Management

Integrated pest management combines preventive and suppression techniques, using less toxic methods to minimize harm to people and the environment. It also promotes sustainable agriculture in the long run. Previously, pest control relied heavily on synthetic chemical pesticides. However, such chemicals strongly harm human health and nature and can lead to resistance in target organisms. The goal of integrating pest management is to minimize this damage and control acceptable infestation levels rather than eradicate undesired populations entirely.

Preventive techniques include the removal of food, water, and shelter from pests. This includes removing or trimming overgrown shrubbery, which provides hiding spots for rodents, and sealing cracks or holes that pests might use to enter your home. It also means avoiding over-watering and keeping compost piles dry.

IPM also involves monitoring pest populations to detect early warning signs. Extensive monitoring enables pest population thresholds to be set, at which point action needs to be taken. This might involve setting baits to capture or kill pests, or it could involve using biological controls such as sterile insect technology to eliminate male pests (and their fertile offspring), which are then released in nature to reproduce naturally.

Physical and mechanical control methods kill or block pests out, or make their environment unsuitable. They can include traps for rodents, mulching around plants to deprive weed seeds of sunlight, and steam sterilization of soil to destroy pathogens or fungal diseases.

If these methods are not effective, it may be necessary to use chemical pesticides. However, the chemicals must be used sparingly and with specific attention to the type of pest you’re trying to get rid of. (No blanket spraying!) They should also be applied only after environmental and preventive measures have been exhausted.

Integrated Pest Management is an excellent choice for your home or business. It’s a great way to protect your property from pests while staying green. As consumers become more aware of the dangers of pesticide chemicals and their effects on humans and nature, they’re looking for greener alternatives, and will reward businesses that offer them. Contact us to learn more about integrated pest management for your home or business.

Hair Extensions – Adding Length, Volume and Thickness to Your Hair in Minutes

Hair Extensions San Francisco are like beauty shortcuts – they add length, volume and thickness to your hair in a flash. They are perfect for those who want to try new styles and create glamorous looks for special occasions.

Hair Extensions

To keep your extensions looking their best, always brush gently and start detangling at the ends. Limit the use of heat styling tools to prevent long-term damage.

Whether you’re looking to add length or volume, hair extensions can be used to transform your look in minutes. The right extension length can make your hair look full, healthy, and beautiful. But it’s important to know that not all extension lengths are created equal. The wrong length can make your hair look too heavy or unnatural. The best way to find the perfect length for your hair is to consult a professional stylist. They can assess your lifestyle, facial features, and hair texture to help you choose the right length.

The right hair extension length can also depend on the method of attachment. There are many different types of hair extensions, including tape-in, clip-in, weave, micro-link, and fusion extensions. It’s important to select a type of extension that will match the color and texture of your natural hair. This will prevent the extensions from sticking out or looking too contrasting.

For most types of hair extensions, it’s important to select a length that is slightly longer than your natural hair. This will ensure that the strands blend seamlessly and prevent any obvious demarcation lines. Typically, the best length for most women is around 4-6 inches longer than their natural hair.

Hair extension length can also depend on your face shape. For example, if you have a square face, you may want to opt for long extensions to add balance to your look. On the other hand, if you have a heart-shaped face, you might prefer to opt for medium-length extensions.

It’s also important to note that the type of hair extension you choose will also determine how much maintenance is required. For example, clip-in extensions can be easily removed and replaced each day, while fusion and sew-in extensions require a bit more care and attention. It’s also a good idea to use sulphate-free shampoo and conditioner when wearing hair extensions to avoid matting or tangling.

Hair extensions can be a great way to achieve luscious, full locks that you’ve always dreamed of. But before you reach for those extra inches, it’s important to consider your lifestyle, style goals, and hair maintenance commitment. It might be that less is more, and your style will thank you for it.

Volume

The term hair extensions often evokes images of flowing Rapunzel-like locks, but they are not just about adding length. They are also a great way to add density and volume to your hair if you have thin or flat locks.

Thin or short hair can make you feel self-conscious and insecure about your appearance, but with the help of extensions, you can achieve a fuller, luscious mane that will leave you feeling confident. There are many different types of extensions and methods that you can choose from, so it is important to find the right one for you.

Mal explained that she recommends Tape-In extensions to her clients who want to have a little more volume in their hair. This method is more durable and less damaging than other types of hair extensions as it uses waterproof, medical grade glue. In addition, the small piece of your natural hair that is sandwiched between the tape-ins matches the weight of the extension, which helps to prevent it from weighing down the hair and causing damage.

Another popular option for boosting your hair’s volume is the hand-tied wefts of hair. These are created with true virgin, raw (cuticle) hair, which means that the strands have not been processed or colored and have kept their integrity. The strands are then hand-tied to the client’s natural hair using a technique called “wefting” which creates a smooth, seamless blend that looks very natural.

Other methods that can help with both length and volume include the strand-by-strand technique, which involves attaching each individual strand of hair with a keratin bond or a micro bead. This allows you to create a more customized look, as each strand is placed where it is most needed. The strand-by-strand method can be a more expensive option, but it is also the most natural looking and durable.

Other types of extensions that can give you length and volume include clip-ins, which are fairly easy to put in and take out as often as you like. They can also be very affordable, but they do not last as long as other types of extensions. Another option is to use sew-in or bonded extensions, which are more permanent options that can be worn for months with proper care.

Thickness

Hair extensions come in a variety of thicknesses, and it is essential to choose the right one for your natural hair density and length. For example, if you have fine hair, thicker extensions will blend in seamlessly and look more natural than thin ones. However, if you have medium density hair, you can go with a range of thicknesses to achieve your desired look.

Thickness also determines how easy it is to style your hair. If you have short, straight hair, it will be difficult to create voluminous curls or chic updos. In this case, it’s best to opt for wavy or curly hair extensions that will naturally give you a full and beautiful head of hair.

Another important factor to consider is the weight of your hair extensions. While it is crucial to choose the right thickness for your hair, it’s equally important to make sure that the weight of the extension matches your natural hair volume and density. A poorly fitting set can cause your natural hair to thin and damage the roots, which can lead to traction alopecia, a condition that causes small bald patches along your scalp.

Many people fear that wearing hair extensions will damage their natural hair, but when used correctly, extensions can be an incredible way to add volume and length to your hair without causing any significant damage. It’s crucial to consult with a trained professional before getting your extensions for the first time, as they will be able to guide you on how to properly care for your new additions.

When it comes to washing your extensions, it’s best to wash them every other day and use a rich deep conditioner to keep them hydrated. It’s also important to avoid over-washing your hair extensions, as this can cause them to deteriorate more quickly. Instead, try to limit your washing routine to every three or four weeks, depending on your lifestyle and how oily your scalp is. By following these simple steps, you can enjoy long, healthy, and gorgeous hair!

Color

Hair extensions are a beautiful way to add length, volume and even color to your look. However, they should not be a rash decision and it’s important to consider all aspects of the process before investing your money.

There are many different methods of hair extensions from clip ins, tape-ins, weave and fusion. They can be made from real human hair or synthetic hair. There are also options for color and texture like ombre or balayage.

The right color is critical to creating a seamless blend. It’s best to choose a shade close to your natural color to ensure it looks undetectable from the start. A good cut will also help the hair blend.

Adding highlights to your extensions can be an easy way to change up the look. However, dyeing your extensions should be done with extreme caution as it can cause damage to the cuticle of the hair strands. This can lead to dryness, tangles and breakage. In addition, it’s generally not a good idea to bleach hair extensions as this can weaken the strands and cause them to shed easily.

If you do decide to dye your extensions, it’s always a good idea to do a patch test first. This will ensure that the hair doesn’t react negatively to the dye and will give you an idea of how they will look after the coloring treatment. It’s also a good idea to only dye your extensions in areas where they won’t be visible as it can impact how they are bonded. For example, you should never bleach fusion hair extensions or lighten keratin bonded extensions as it can cause them to break down and fall out. It’s also recommended to use a demi or semi permanent hair dye when coloring your extensions as it will be more gentle on the cuticles. You should also avoid using ammonia hair dye as this can cause chemical damage to the hair.

Navigation