Driveway Repair Charleston SC takes more than just filling in a few cracks and smoothing over the surface. It also involves addressing deeper problems like erosion, structural instability or drainage issues.

Hiring professionals allows for thorough assessments of extensive damage and offers access to advanced tools and materials that can offer lasting solutions. Regular maintenance minimizes damage probability and a fresh coat of sealer every 1 to 2 years guards against environmental stresses.
Cracks in driveways are common and can result from many factors, including weather conditions, ground movement, and wear and tear. These cracks may indicate underlying problems that should be addressed immediately for the safety of pedestrians and vehicles. Repairing these cracks promptly can protect the integrity of the concrete, prevent water damage, and reduce future cracking.
Hairline Cracks
Small, hairline cracks less than 18 inch wide are typically cosmetic and do not cause structural damage. They can be filled with concrete crack filler or liquid sealants for a quick fix. To avoid further damage, be sure to clean the crack thoroughly and apply a quality product that matches the color of your driveway for a seamless repair.
Medium Cracks
These cracks are typically caused by minor shifts in the soil or slight settling of the concrete slab. The most common repair method is to use concrete patching compound to fill these cracks and smooth the surface. If these cracks are left unattended, they may worsen over time and could lead to surface deterioration or even potholes.
Large Cracks
If you notice larger cracks in your driveway that extend across a significant portion of the surface, it is recommended to have them repaired by a professional. These cracks can indicate a deeper problem with the foundation or soil, and require specialized repairs.
Settlement Cracks
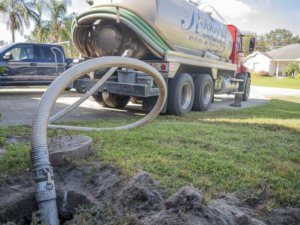
Over time, underground voids or poor drainage can cause the ground to sink beneath the driveway, which can lead to cracking. Depending on the severity, these cracks may be repaired using slab jacking or geo-polymer injection slabjacking.
Whether or not you choose to have the larger cracks in your driveway repaired, it is a good idea to install proper drainage systems to keep water away from the area. Water can seep into cracks, freeze, and expand when thawing, causing the cracks to widen. Preventing this from occurring requires that you regularly inspect your driveway and implement a maintenance plan, such as applying a high-quality concrete sealant, to ensure that the base layer remains strong and durable. In some cases, removing nearby trees or installing root barriers may also be necessary.
Potholes
Over time, driveways can develop potholes that can be a pain and damage your car. They are caused by water seeping through cracks, freezing in cold temperatures and thawing, then the repeated cycle of expansion and contraction eventually weakens the pavement. Overly heavy vehicles like trucks can also exacerbate the wear of asphalt pavement, especially on softer sections of the surface.
Ideally, you should grade your driveway regularly to prevent water from pooling in the same spot. You should also keep water draining away from the driveway by clearing your gutters and ensuring downspouts are functioning properly. If the problem persists, you may need to install a drainage system.
Filling potholes requires removing dirt and debris from the hole, reshaping the edges of the crown and adding new asphalt. Then the surface needs to be heated to soften any extra moisture and add strength to the patch. Most professional contractors opt to use ready-to-pour asphalt, as it eliminates the hassle of mixing and offers a high-quality repair job.
Before applying the patch, make sure to thoroughly clean the area by using your wire street broom or power washer. This helps ensure that the patch will adhere to the underlying pavement and not just the loose pebbles in the pothole. Then you can get to work filling the potholes.
If you have a large pothole or a section of your driveway with alligator cracking, it will probably need more than just a simple patch. You may need to dig up and replace the damaged section of your driveway to avoid further damage and deterioration.
The best way to prevent potholes is by maintaining your driveway with regular grading and patching, as well as cleaning oil and fuel stains as soon as they appear. This can help to reduce the occurrence of potholes and prolong the life of your driveway. For long-term maintenance, you should try to limit the number of heavy vehicles on your driveway and consider laying a geotextile over your gravel. This permeable fabric is designed to stop mud from moving through into the gravel and can help prevent water flow problems beneath your driveway.
Weeds
Weeds sprouting up between your gravel stones are one of the most common problems with this type of paving. It’s a problem that’s difficult to eliminate completely, even with regular maintenance, but there are ways to limit the amount of time and effort it takes to keep your gravel driveway weed free.
A key is to remove any new weeds promptly, before they get too big. You can do this by hand or with a garden tool like a fork or trowel. If possible, make sure to remove the entire weed from the bottom up, roots and all. This is important because if you leave any part of the root, it will resprout and grow back. If you find you can’t get the weed out by hand, then there are several natural remedies that may help. Boiling water is one option that will quickly kill weeds, but you’ll probably need to pour it into many different cracks in your gravel patio or driveway for it to be effective. Baking soda can also be used to kill weeds, as it draws the moisture out of the plant, drying it up and causing it to die. You can also use rock salt to kill weeds or prevent them from growing by applying it along the edges of your gravel driveway. If you’re really serious about keeping your driveway weed free, then there’s always the option to purchase and use a weed killer. These chemicals can be highly effective but they’re typically more toxic than the natural alternatives.
It’s best to try and prevent weeds from growing in the first place. If you have a paved surface, this is much easier than with gravel because weed seeds can’t penetrate the concrete or asphalt. However, over time, gravel can become worn down or erode, providing access to soil where weeds can take hold. Adding landscape fabric or geotextile barriers to the surface before putting down your gravel can help prevent this from happening. It will act as a physical barrier that keeps weed seeds from reaching the soil beneath the gravel and it’s also possible to install these barriers in existing gravel surfaces, too.
Uneven Surface
Rough or uneven surfaces in your driveway not only are an eyesore, but they can also pose tripping hazards for children and adults and affect vehicle alignment. They may even cause structural damage if left unaddressed. Whether minor in nature or due to structural issues, these uneven concrete areas are usually indicative of deeper problems that require professional help to solve.
A faulty foundation or sinking soil can put an unequal load on concrete, which results in cracks and surface unevenness. Over time, these issues can also cause the surrounding materials to shift or erode, contributing to additional damage. Additionally, expanding tree roots can exert pressure on concrete from underneath or adjacent to the structure, worsening existing cracks and creating new ones.
Fortunately, professional driveway repair services can effectively address these problems with minimal disruption to your daily routine. The first step is to carefully assess the condition of your concrete surface and determine the severity of the damage. A professional inspection can also identify the root cause of the problem and recommend the best solutions, saving you money in the long run.
Some repairs are more straightforward than others, such as filling in cracks and repairing potholes. For a more permanent solution, you can opt for a concrete leveling service like polyjacking. This method involves drilling small holes into the affected areas of your concrete and injecting high-density polyurethane foam that expands and fills voids beneath the slab, lifting it back to its original level.
The process is quick, requiring less than one day to complete most projects. The polyurethane used is not only effective at leveling uneven concrete, but it also adds structural strength and enhances the longevity of your concrete surface.
If the damage to your driveway is severe or has already progressed beyond simple repairs, it may be time to consider replacing it entirely. This option can provide a fresh, smooth surface that improves curb appeal and raises your property value. Additionally, you can take advantage of new construction techniques and materials that are more resistant to future damage.