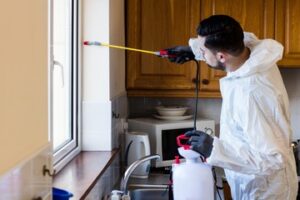
Mold Inspection Staten Island is performed by qualified professionals who examine your property, both inside and out. They look for discoloration, water damage, musty odors, and other clues that suggest hidden mold.
The professional may also use an air sampling device to collect mold spores in the air. This can help identify the species of mold and its severity.
Aspergillus is the most virulent of all airborne opportunistic fungal pathogens. Its spores (conidia) are small enough to bypass mucociliary clearance and reach the lower respiratory tract [3]. Inhaling A. fumigatus spores can result in the life-threatening invasive aspergillosis and a variety of hypersensitivity reactions in immunocompromised humans. Invasive aspergillosis is characterized by fever, chest pain, cough, and bleeding from the nose and throat. It can also spread from the lungs to other parts of the body.
Aspergillosis is most dangerous for infants and young children, the elderly, and people with weakened immune systems such as those receiving chemotherapy or suffering from AIDS or cystic fibrosis. It can also cause a wide range of respiratory problems and in severe cases may lead to internal organ infections.
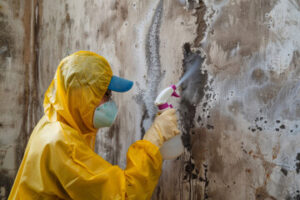
Mold testing is essential for homeowners and property owners to understand the presence of Aspergillus and its potential health effects. This includes identifying the type of Aspergillus and determining how widespread the contamination is within a home or building. It also helps to pinpoint the source of the problem, such as poor ventilation and humidity control, and identifies potential sources of spore growth.
Mold testing can be done by collecting surface samples, air samples, or both to test for Aspergillus and other fungi. Air samples are the best way to assess the overall spore count in a room, while surface samples can help identify specific areas of contamination. Generally, Aspergillus and Penicillium are grouped together during testing because they are so closely related.
Aureobasidium
Aureobasidium is a common fungus that occurs in many outdoor and indoor environments. Its spores are wet and spread through the air by wind. This fungus is commonly found growing on surfaces that are continuously damp in bathrooms and kitchens. It is also found on plant leaves, fruit, marine estuary sediments, and wood. Its spores can cause allergic reactions in some people. These include hay fever, asthma, and sauna taker’s lung. It can also cause skin lesions and keratitis. Its presence in the environment is sometimes referred to as toxic black mold, although this term is not scientific and often refers to Stachybotrys.
Species of the genus Aureobasidium are known for their ability to change their morphology to match their environment. This is due to their extreme genetic instability, which allows them to survive in a wide range of conditions. The most common species are A. pullulans, A. melanogenum, A. subglaciale, and A. namibiae. These fungi are important producers of pullulan, a natural polymer that is used in various industries.
This fungus is a member of the class Dothideomycetes, and its members are close relatives to Aspergillus and Penicillium. Several species from the genus Kabatiella, including Selenophoma mahoniae and Columnosphaeria (Discosphaerina) fagi, have been transferred to the genus Aureobasidium based on phylogenetic analysis and morphological characteristics. However, the transfer has not been formally approved by the International Code of Nomenclature for Fungi.
Chaetomium
Chaetomium is a dark mold that thrives in cellulose-rich environments. It typically grows in areas where water damage has occurred and in high humidity conditions. It also produces mycotoxins, which can cause health problems for people with sensitivities to the fungus. These symptoms can range from skin rashes to respiratory issues. It is important to have a chaetomium allergy test done before starting treatment. The test measures the levels of IgE antibodies to Chaetomium globosum in the blood. The results of the test should be interpreted in conjunction with a person’s symptoms and medical history.
While chaetomium is a common mold, it is difficult to detect by air sample swabbing. The spores of this mold have a slimy texture and are shaped like footballs, making it difficult for them to rise into the air and escape the air sampler inlet valve. They are also much heavier than other mold spores, which makes them difficult to capture by the air sampler.
A chaetomium infestation can be removed with regular cleaning and a mold-killing product. It is also important to dry the area thoroughly after each cleaning. For severe infestations, professional chaetomium remediation services may be needed to remove the fungus and prevent its return. They can also help identify and fix any moisture or ventilation issues that contribute to the regrowth of the fungus. They can also provide ongoing maintenance and inspections to ensure that the problem does not recur.
Cladosporium
Cladosporium is a genus of mold that thrives in damp, warm indoor environments. Its spores can become airborne and inhalation can cause allergies, especially in people with asthma. It can also irritate the respiratory tract and cause itching and sneezing. It has also been shown to cause sinus congestion and eye irritation.
Cladosporium can be difficult to identify, but it has an olive-green or brown color and a powdery or fluffy texture. It has a strong odor and can spread quickly. It grows on moist or water-damaged surfaces like wood, wallpaper, carpeting, and insulation. It can also grow in air ducts, where it can circulate throughout the entire building and create health problems for the occupants.
Homeowners and business owners can prevent the growth of cladosporium by keeping humidity levels low. They can use dehumidifiers in damp areas and ensure proper ventilation in bathrooms, basements, and kitchens. They should also repair any leaks and water damage promptly.
If you suspect that you have a Cladosporium infestation, it is best to hire professionals for testing and removal. They can also use moisture meters to pinpoint areas where hidden moisture is contributing to the problem. They can then recommend steps to take to prevent future contamination. Professionals can also clean contaminated areas using specialized equipment and non-toxic cleaners. They can also test the air and surface for mold spores after the cleanup.
Fusarium
Fusarium is a fungal genus that is found in both natural and agricultural ecosystems. The fungus is known for its ability to cause crop diseases and can even ruin entire crops. Crop rotation with non-host plants and the use of tolerant or resistant cultivars help reduce the population of Fusarium in the soil and prevent crop loss. In addition to its role in crop diseases, the fungus produces several phytoalexins that are used as antimicrobial agents. It also produces the immunosuppressive agent ciclosporin A, which has revolutionized organ transplantation.
Traditionally, the identification of Fusarium fungi has been based on morphological characteristics. However, molecular phylogenetic studies have shown that many morphospecies are cryptic and may represent different species complexes (Balajee et al., 2009). Isolates obtained from patients with fungal infections have also shown a high genetic diversity. The most prevalent clonal lineage of Fusarium oxysporum is responsible for most clinical cases. Isolates of the same clonal lineage have also been detected in the water systems of three hospitals, which suggests that nosocomial waterborne fusariosis is common.
In general, the spores of most Fusarium species are not readily airborne and are only produced in wet or damp material. When present in indoor spaces, they are usually an indication of a water problem. Because of this, identifying a particular mold type is best done by an expert. Using specialized equipment and testing methods, professionals can determine the specific mold type, as well as its source.
Penicillium
Penicillium is a common mould that can be found in buildings. It is often the first colonizer of wall cavities and can destroy different building materials. It produces many VOCs when grown on building materials, including geosmin and other alcohols. When it grows on gypsum board, it also produces metabolites such as 3-methyl-1-butanol and 2-methyl-1-propanol. It can also grow well on wallpapers.
It is an important allergen and causes respiratory symptoms in some people. It can trigger asthma, nasal congestion and bronchitis. It can also trigger anaphylaxis in those with sensitive immune systems. It is also known to produce mycotoxins, which can damage internal organs.
The genus contains more than 300 species and has been a major source of antibiotics. Many of these species are pathogenic and some cause food spoilage. They are able to produce mycotoxins and can lead to opportunistic infections, such as keratitis (eye infection), otomycosis and endocarditis (following the insertion of valve prostheses).
Identification of Penicillium is usually done by morphological characteristics and microscopy. In addition to morphological methods, mass spectrometry can be used to identify Penicillium species. In a study, 25 isolates were analyzed by MALDI-TOF mass spectrometry using ITS and b-tubulin loci. The results showed that the method was able to identify all of the isolates. In addition, the fungi could be identified by their characteristic m/z values. This technique is an excellent alternative to hyphae identification in culture.